Powerful images

Palm Valley near Alice Springs 109.jpg
Palm Valley, near Alice Springs, Australia: The person standing on the top of the rock brings a surprising sense of scale to the image.

As teachers we know the power of an image. An interesting picture can be inspirational. I favour using images that I’ve taken myself. There are three main reasons for this:

  1. I know I have permission to use it and I am modelling academic honesty in the most authentic way to my students.
  2. I know that what the image conveys is what really happened.

And, most importantly:

3. I can authentically relate my experiences to the topic at hand, and show that geography is not just in textbook (or on a website).

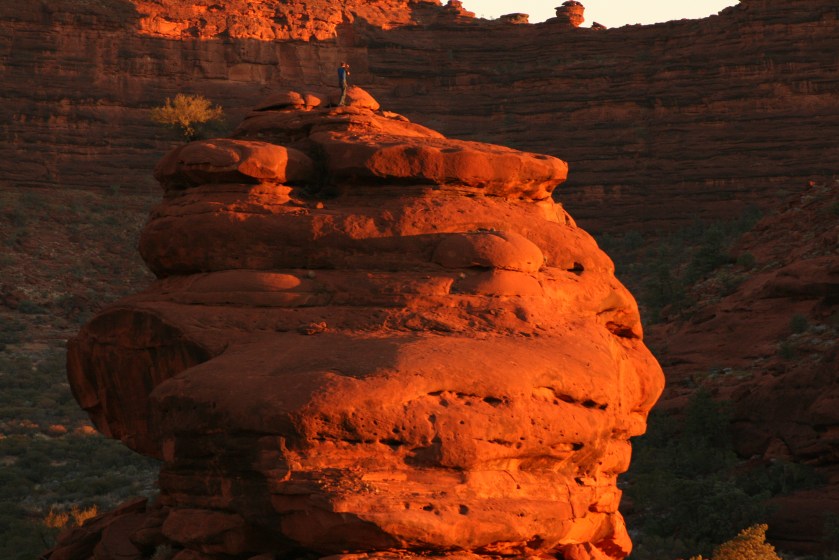
Take the image above as an example. It really was that red – something I had always thought was being faked in magazines and travel brochures – because of the high iron content in the rocks. And because I know the person in the picture (he’s called Andy, and he’s from Austria), I can talk about the incredibly dangerous climb he made up the rock face while the rest of us sat on the opposite hill and planned the trip to the nearest hospital (150km away), and relate it to remote tourism and the rural facilities hierarchy. And, I can talk about how this place, called Palm Valley, is so named because it contains relic species of palm that were trapped here as the continents moved and the need to adapt to the competition ceased.

On GeographyCaseStudy.Com, all the photographs are mine. You’re welcome to borrow any that you think are useful, but it’s always better to have a personal touch and use your own.


Hypothesis based lessons 

Many of us discuss hypotheses only as part of fieldwork and internal assessment (or course work) and the skills based sections of exams. But the humble hypothesis can be used in regular lessons quite easily using the resources on this site. This approach is best suited to teaching case studies.

Introduce the issue 

Introduce the issue to students. For example, if you have previously studied urban land use models, you might ask the students to consider how they fit the reality of a town or city. 

Introduce the hypothesis 

It’s likely that hypotheses have been covered before in science and maths, as well as geography lessons. Ask students to come up with criteria for a good hypothesis. Share these together as a class.

Create a hypothesis 

Now ask students to consider the case study area. What do they predict they will find?

It’s vital to check the hypotheses they produce before they begin the investigation. Ideally have them do the hypothesis creation and the investigation in separate spaces so you can literally act as a gate keeper to the ‘fieldwork site’.

Investigate 

This is the ‘meat’ of the lesson, and your opportunity to be creative and provide a memorable learning experience.

Print out the graphics or paragraphs that you think are relevant to the overall issue. Remember to warn students that not all the data is necessarily directly relevant to their hypothesis. Stick the print outs around the walls of the classroom, corridor, or whatever space you’re using. Students then progress at their own pace around the ‘fieldwork site’ finding the evidence relevant to their hypothesis. Sometimes they might need reminding that even evidence that goes against their hypothesis must be recorded.

Think carefully about the space. For example, if you’re studying the difference in participation in sports between the USA and China, could you use English and Chinese classrooms?

Feeding back 

Graphical understanding needs to be taught. Gather the students back  together and go through the evidence, making sure everyone has understood. 

Responding to the hypothesis 

In the initial introduction to hypotheses, you will have discussed how hypotheses should be accepted or rejected. Ask the students to write a ten minute explanation of their decision to accept or reject, using evidence from their fieldwork. If you have time, try peer assessing the writing using criteria from your exam board.